Beginners Guide To Canning Peaches
By Alex C
Senior Food Writer at Pro Home Cooks
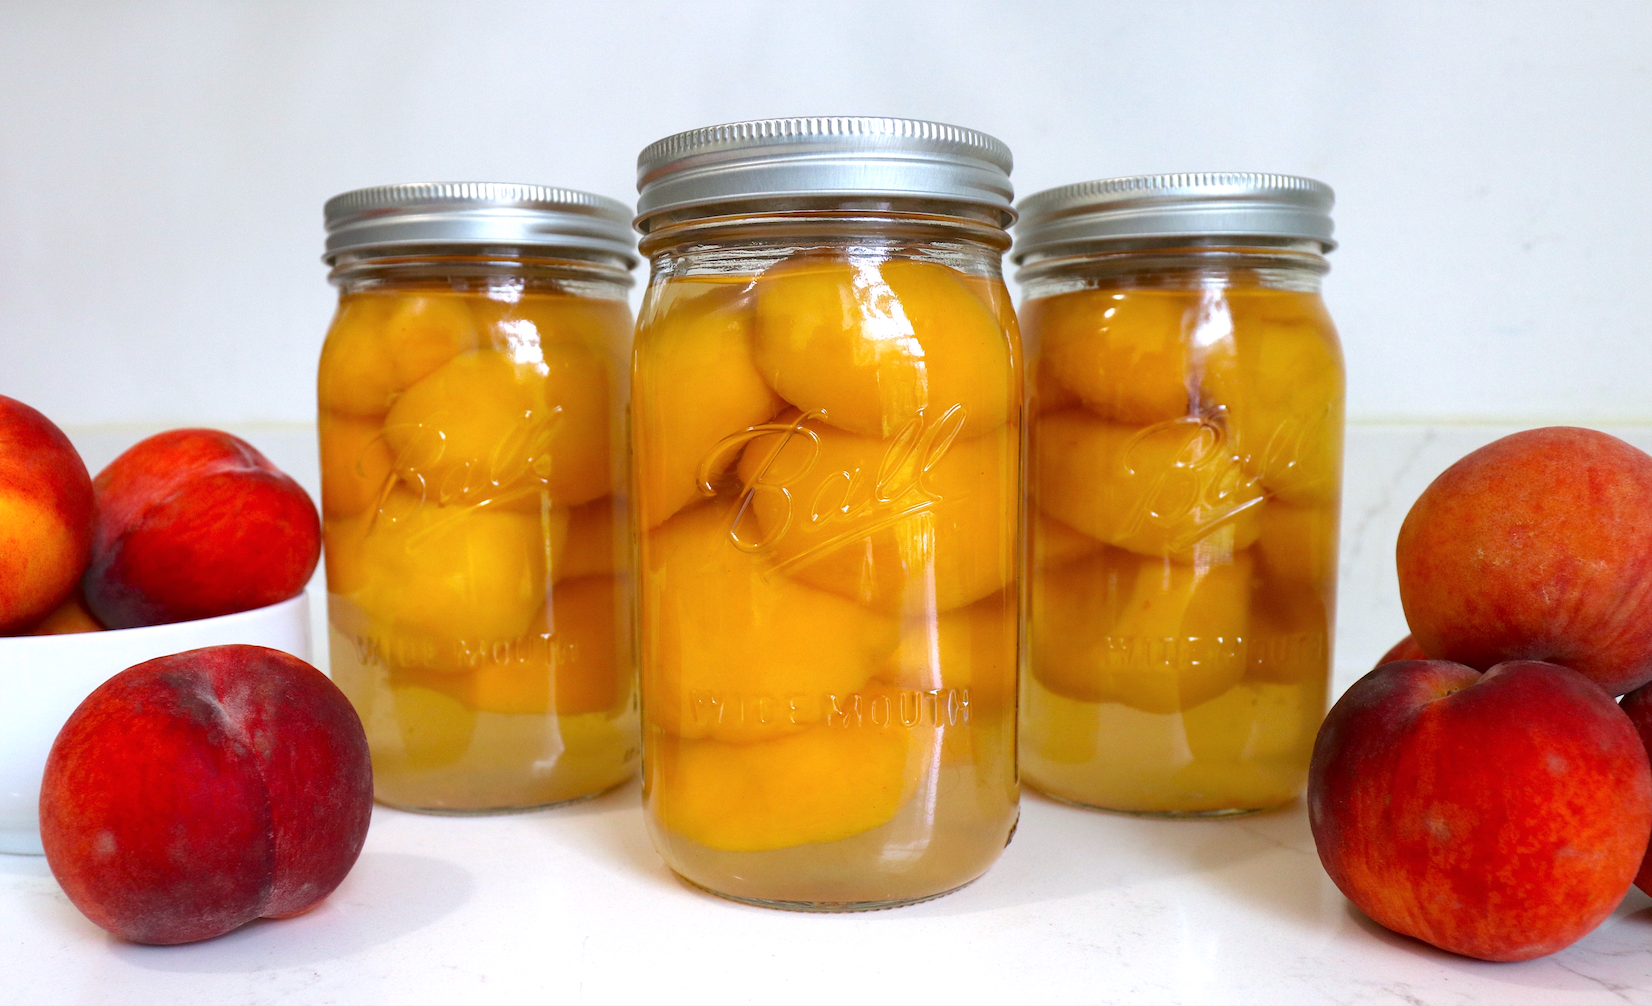
Summer time is prime time for most fruits and veggies so not only am I eating them by the handful, I am also buying them in bulk to preserve them for the rest of the year. Peaches in particular are so sweet and juicy that most times you need to eat them over the sink! Although there are many ways to preserve fresh produce, in my opinion, canning is my favorite. It does the best job of retaining the natural texture, juices, and flavors as well as having longer storage! If you’ve canned tomatoes before, you’re in luck because canning peaches are easier in my opinion!
There are a few things you will need to start canning: A bunch of jars (wide mouth if you can) and their lids, a large pot & its lid, one to two large bowls, canning tongs, metal steaming rack, and wide mouth funnel. You are going to be working with a pot of boiling water and glass jars so although the last three items are optional they are definitely recommended!
Throughout my few years of canning, I have learned that a well prepped and cleaned station is the best! So before you start working on the peaches, sterilized the jars and their lids in the dishwasher, boil them, or wash them with some soap and warm water. Then get the largest tallest pot you have and fill it to the same height that your jars are. (Ex: 7 inch tall jar so fill your pot with 7 inches of water.) Place a metal steaming rack at the bottom of the pot and bring to a light simmer about 185 degrees Fahrenheit.
Now onto the peaches! Freestone yellow peaches are best for canning. White peaches don’t have as much acidity making it difficult to preserve and cling peaches stick to the pit making them very difficult to separate so you’ll likely lose a lot of good peach flesh in the process of trying to remove the pit. You want to use peaches that are small to medium in size because they will fit easier in the jar and you want them fully ripe. Soft but firm to the touch when you hold them and with minimal bruises and no rotting spots. If some ripen early, you can store them in the fridge for a couple of days while the others catch up.
Now, removing the skin of the peaches is not necessary but I like to remove them. You do this by running a knife around the pit then twist the peach in half to reveal the pit. Remove the pit then using a paring knife cut/scrape the skin off each half.
Alternatively, you can submerge the peaches in hot water for 30 - 60 seconds and then into an ice bath to cool down. The peach skin will peel right off. If you choose to submerge them in hot water, keep them whole then peel the skin and remove the pit. The method you choose will depend on how ripe your fruit is. The skin of ripe fruit will come off easily!

From here, give the peach a quick check and cut out any bruises or rotting parts that you notice. You can keep the peaches in half or you can slice or dice them further depending on how you want them.

To keep them from browning while you finish removing the skin off of all the peaches, place them in a cold water bath with a squeeze of lemon juice. Repeat the peeling and depicting process with the rest of your peaches and by the time you're done, you should have a bowl of peeled, cleaned, and prepared fruit. Set it aside while you work on your canning syrup!

You can use apple juice, white grape juice or my personal favorite, a homemade simple syrup! Peaches are high in acid so they will hold up just fine in water. However, using plain water will wash out that sweet peachy flavor that we are looking to keep so instead I like to do a mixture of water, lemon, and sugar. The lemon will prevent the growth of bacteria allowing you to store your peaches longer while the sugar will help retain the flavor, texture of the firm fruit and its bright color. The best part is that you can control how much sugar will go into your preserving solution.

There are two ways you can can peaches: the hot pack or the raw pack method. When you are hot packing peaches, you are cooking the peeled & pitted peaches in the syrup before canning them. This will release some of the air the peaches have which will prevent them from floating and browning over time. They will also retain their quality and last longer than the raw pack method.
The raw pack method is when you pour the cooked syrup over the packed peaches before they are sealed and processed. It is much easier to handle and perfect when you are going to eat them over the next 3 months. Otherwise, they may brown and deteriorate over time. Although they brown they are still good to eat. You can also tell when a jar has been raw packed because the peaches will float to the top because the air hasn't been cooked out.
Regardless of which canning liquid/method you decide to use, heat the syrup up until it simmers. If you are raw packing place the halved peaches into the sterilized jars. Don’t over pack and don’t push them in, just place them in gently. Once the canning liquid has come to a boil and the sugar is fully dissolved, pour it over the peaches. Be sure to leave 1/2 inch of headroom. Wipe down the rims of the jars to ensure a tight seal and tightly screw on the lid. Repeat with the remaining jars of peaches.
If you are hot packing the peaches, place the peaches in the hot syrup and cook for 2-3 minutes before lading them into the sterilized jars. If you have large mouth funnel you can use it to help you ladle the hot peaches in! Be sure to leave 1/2 inch of headroom. Wipe down the rims of the jars, being very careful because it will be very hot. Repeat with the remaining jars of peaches.


TOP ARTICLES

Sourdough Baking School
Master the art of sourdough bread baking in the most comprehensive baking class on the internet. This class features over three hours of baking content to help you start your sourdough journey.
See More


