Making vinegar from scratch
By Alex Chung
Senior Food Writer at Pro Home Cooks
Alright you guys, get ready cause this weeks video is super exciting and informative. I want to welcome you into the captivating world of vinegar! You guys know that I’m obsessed with all things fermentation. Anytime I ferment something like komucha, beer, or cheese. They always come out much better than the store bought stuff and you save tons of money. Vinegar has been something on my radar so let me teach you everything I’ve learned through my many trials, failures, and finally success!
First, let me breakdown the good ole science aspect behind all things vinegar. There are three different elements that make up vinegar. These are water, 4 – 6% acidic acid & flavorings of your choice. Once you have these three things you are ready to start the unique 2 step fermentation process to create vinegar.
Part 1: Alcohol Fermentation

Step 1: First you’ll need to make alcohol.
You need a product that has naturally occurring sugar (aka the flavoring of your choice) and wild yeast (aka your environment) that will be feeding off of those sugar. The byproduct of the two is the alcohol.
Part 2: Turning Alcohol Into Vinegar
Step 1: Exposing Your Alcohol to its New Environment
Once you have your alcohol and you expose it to the environment that contains tons of bacteria, particularly one called acetobacter. These guys are going to enjoy feeding off the alcohol. However, it will need oxygen to survive so be sure to always have your jar open.
Also, acetobacter will only thrive in a specific range of alcohol, about 6 -12% ABV works perfectly. Anything below 6 or above 12 will die so sake, beer, and wine are great to turn into vinegar. Think malt vinegar, red wine vinegar, rice wine vinegar, and apple cider vinegar.

Step 2: The Waiting Game
When you have your alcohol exposed to all that oxygen, that is when your acetobacter can thrive and turn your alcohol into acidic acids that make up vinegar. This process can take anywhere from 20 – 40 days but everyday you should take the time to stir up your vinegar and see how it develops and ages.
Et viola! Now you can now make your own homemade vinegars.
My Failures are Your Learning Lessons!

Before you head to the kitchen to start your vinegar journey let me tell you about my vinegar mistakes I’ve made so that you can have a higher rate of success!
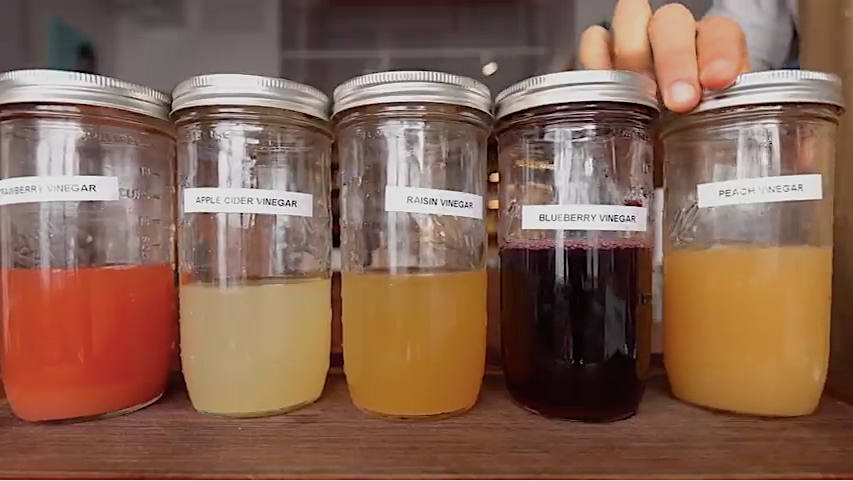
I decided to make some fruit vinegars and went to the farmers market to get peak fruits that was chock full of sugar. I made tons of fresh fruit vinegars and one raisin aka the only dried fruit I did. Well, all the fresh fruit vinegars started to grow mold… except for the raisin one. It has lots of bubbles, smelled great, and after 30 days I had an incredible raisin vinegar! Plus, that raisin vinegar will continue to age beautifully and develop its flavors.
I restarted the process but used only dried fruits such as apples, strawberries, mangoes, blueberries, and peaches. The outcome was tons of delicious vinegars. For more information, a step by step process of how I made each vinegar, and to see what awesome recipes and drink I made with all my homemade fruit vinegars check out my video here!
TOP ARTICLES

Sourdough Baking School
Master the art of sourdough bread baking in the most comprehensive baking class on the internet. This class features over three hours of baking content to help you start your sourdough journey.
See More

