This Is The Only Chocolate Cake You Will Ever Need In Your Life
By Alex Chung
Senior Food Writer at Pro Home Cooks
Layer cakes will always have a special place in my heart because they were my first “big” baking adventure. I think I spent over three years of my teenage life making 3 layered cakes. They fascinated me. Three layers of cake, 2 layers of filling, and frosting. Literally endless possibilities of combinations, processes, flavors, colors, textures. I could dream up a cake that no bakery around the world would ever have. My little mind went into hyperdrive. Carrot cake heavy on the cinnamon with no walnuts or raisins, rich purple velvet cake with extra cocoa powder & heavy on the cream cheese frosting, pumpkin spiced chai in the middle of summer, yuzu matcha coconut cake, naked cakes, fondant cake, all the cakes! Getting to spend two to three days just making one cake was my dream. Eating all of it was another.

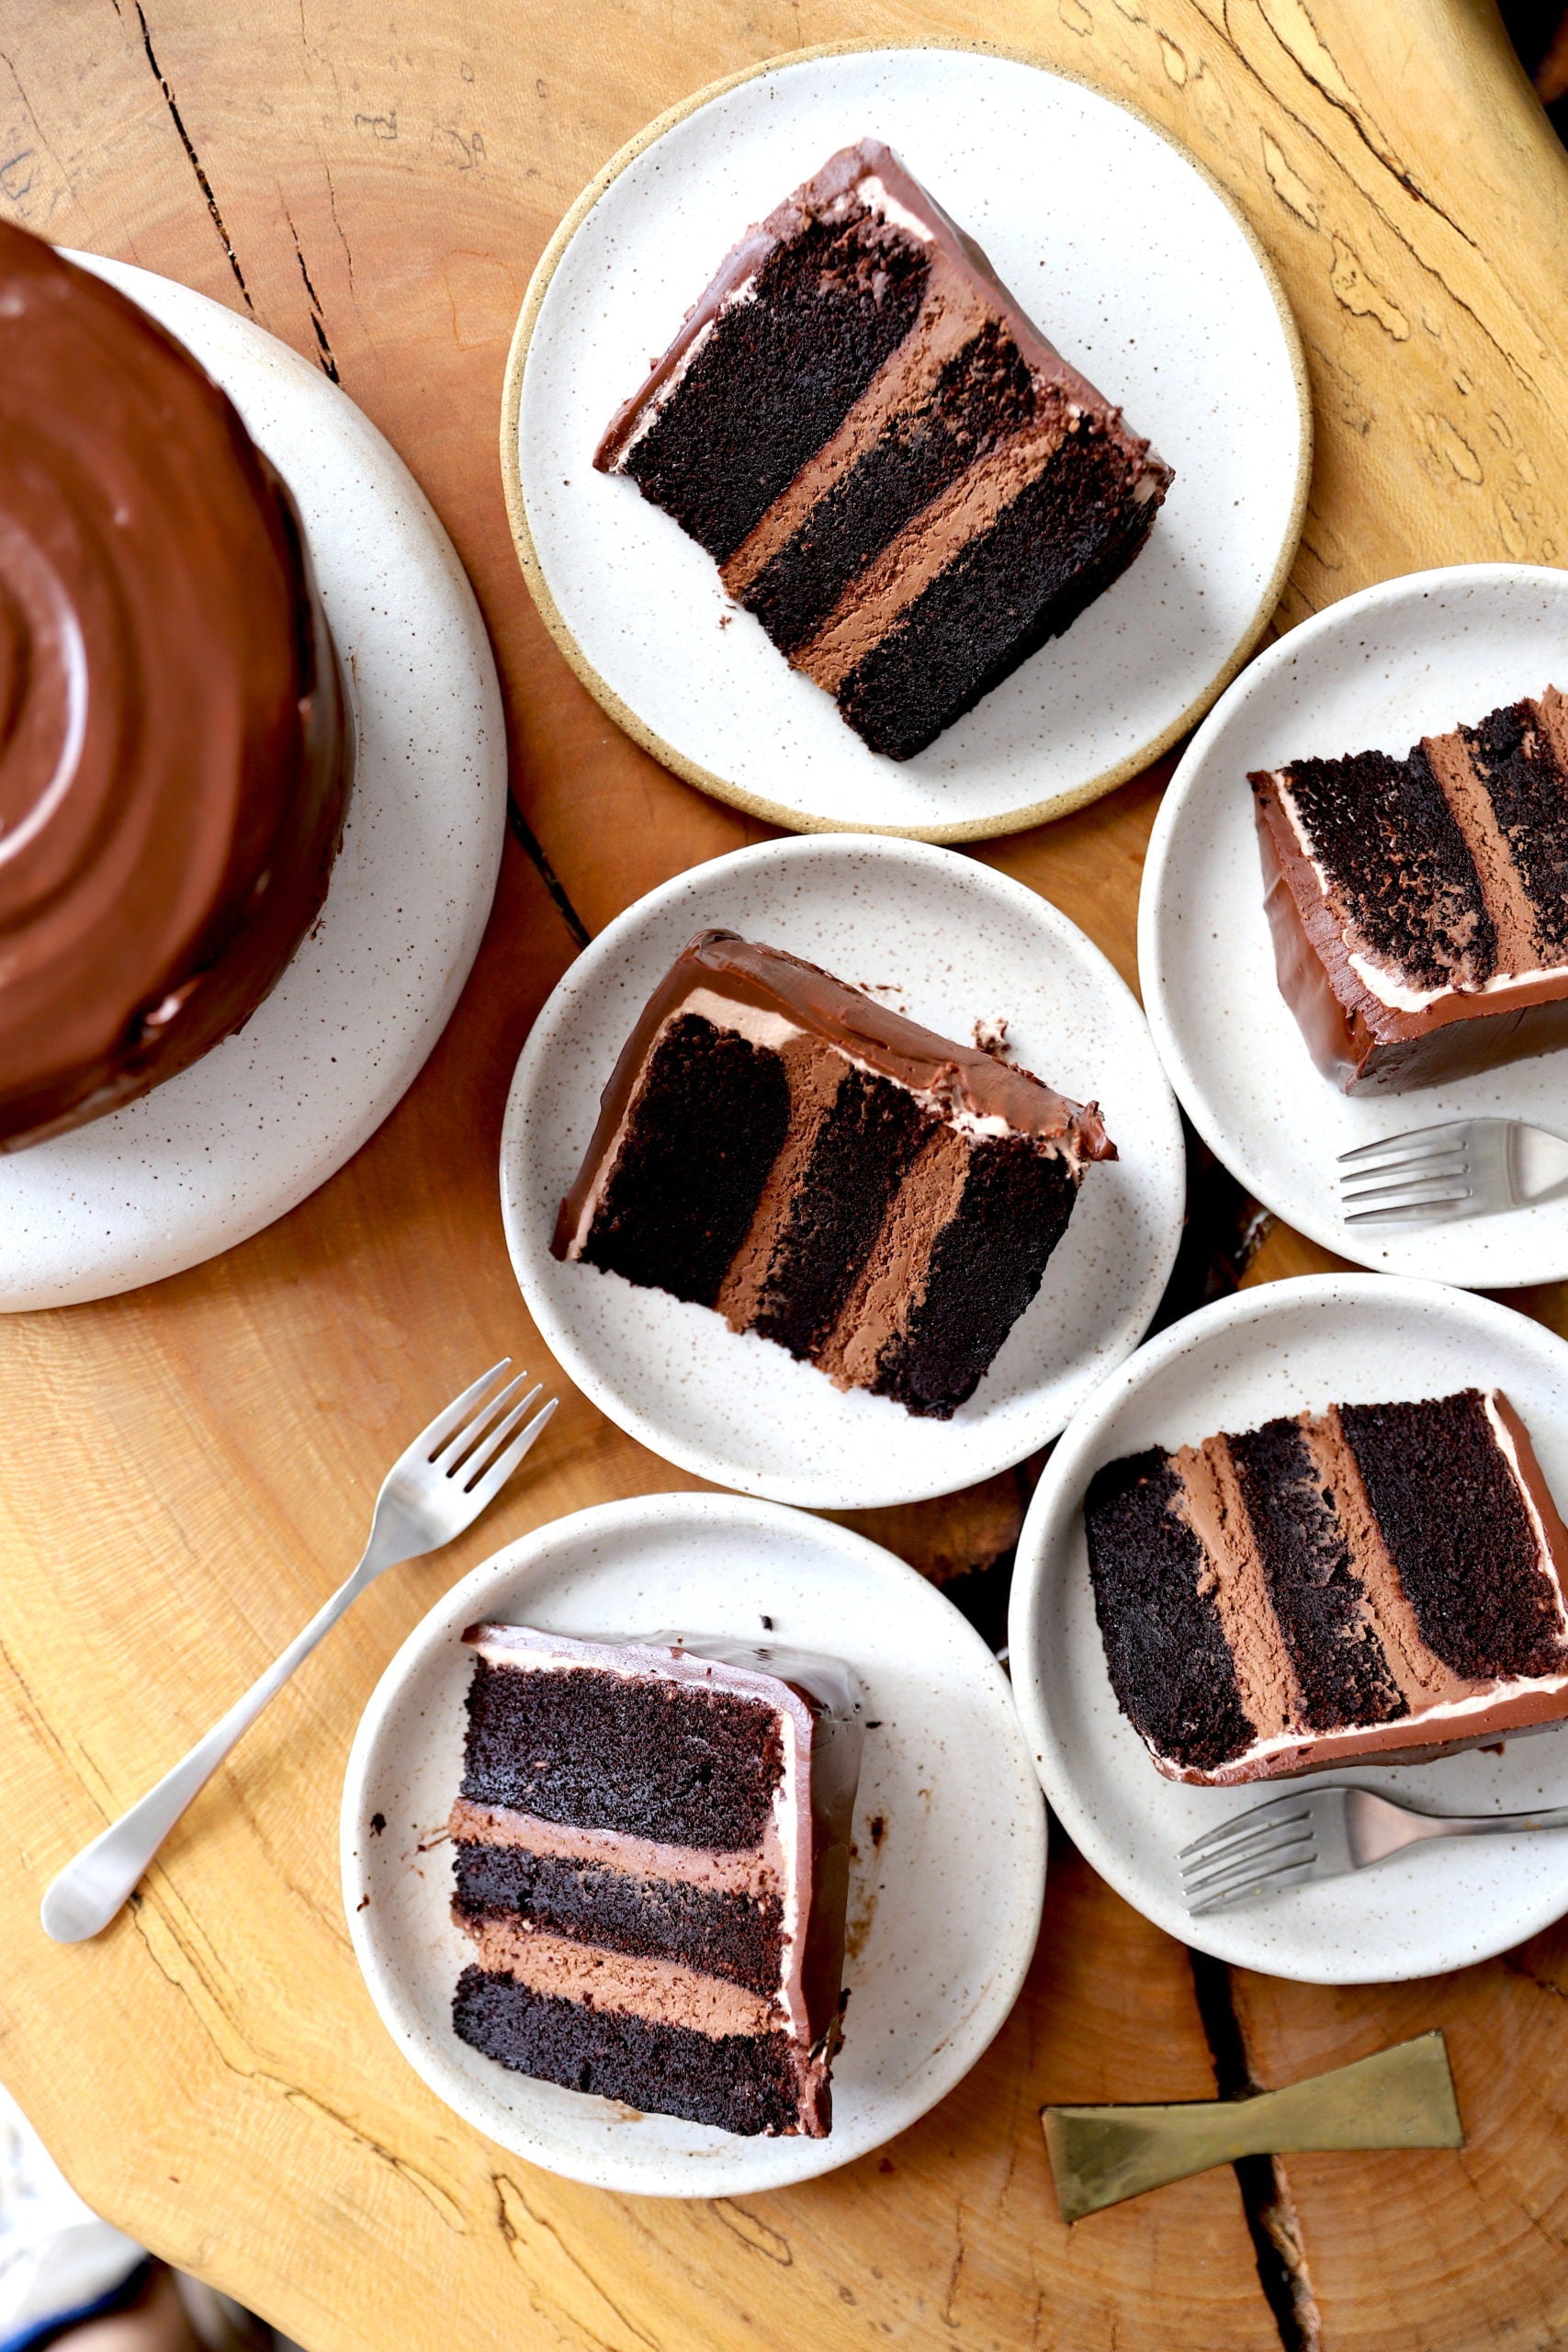
Out of all the cakes that I made when I was younger, my chocolate cake with chocolate mousse filling and chocolate ganache frosting was the one that I could always eat. There’s just something so special about a moist, soft, fluffy yet rich chocolate cake that everyone including myself goes absolutely wild for. To this day, chocolate cake is my all time favorite. Of course, sometimes I feel like a classic vanilla vanilla or a zesty lemon cake but chocolate cake is the one cake that will never let my chocolate loving heart down. I know it will always be there for me. So, when I made this triple (almost quadruple chocolate cake) I knew that I had to do right by it.
It may seem like a lot but each recipe by itself is super easy. If you need to, divide the recipes into days. The cake might take you a couple days to make but this cake is well worth the labor of love. It will pay you back ten fold through flavor and pure joy. The cake is made in one bowl just like a box cake would be but the flavor is out of this world. This was intentional because I love how easy one bowl recipes are. They’re one and done. The mousse may use a couple more bowls that you prefer but I promise you won’t try a better mousse. And the ganache… well, its a thing of beauty. Perfectly glossy and tempting. All together this cake is the cake of every one’s dreams. This cake is that cake you eat when you are craving a CHOCOLATE CAKE. It’s the cake you keep in your freezer for the days when the world is testing your patience and nothing on netflix, a bubble bath, or a bottle of wine can fix. It’s the cake you keep in the freezer and label it roasted veggies so no one dares to touch it. This cake is the cake that will bring a smile to your face day in and day out. Give it a try and I promise it won’t let you dont because it has never let me down.
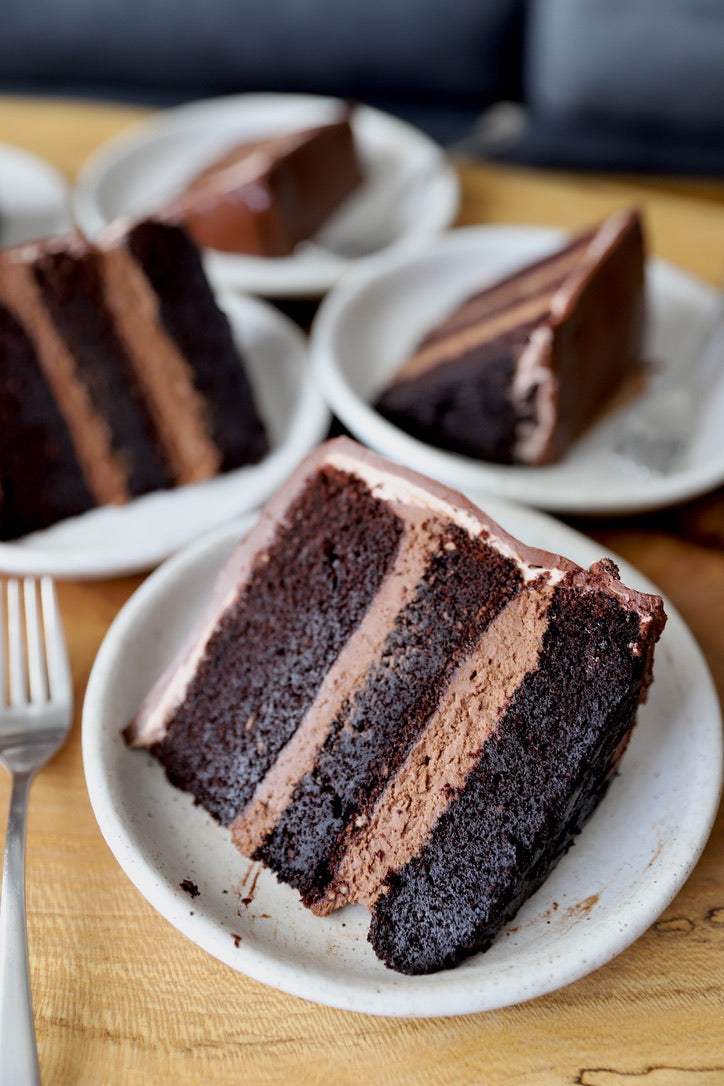
One Bowl Chocolate Cake

Ingredients:
- 7.42 ounces or 1 ¾ cup of all purpose flour
- 14 ounces or 2 cups of sugar
- 3.4 ounces or ¾ cups of cocoa powder
- 8 grams or 2 teaspoons of baking soda
- 8 grams or 2 teaspoons of baking powder
- 4 grams or 1 teaspoon of salt
- 8 ounces or 1 cup of buttermilk
- 4 ounces or ½ cup of oil
- 2 large eggs
- 8 ounces or 1 cup of hot coffee or hot water (coffee is preferred)
Instructions:
- Start by preheating your oven to 350 degrees f. Line three 7×3 inch pans with parchment paper.
- In a large bowl, sift the flour, sugar, cocoa powder, baking soda, baking powder, and salt. Then add in the buttermilk, oil, and eggs. Whisk is until you have beautiful thick chocolate batter.
- Lastly, pour in the hot coffee or hot water and whisk until fully combined. The batter will be thin.
- Divide the batter evenly into the three prepared pans and bake for 22 minutes. Once it comes out of the oven, let it cool down completely. In the meantime, you can prepare the mousse.
Chocolate Mousse

Ingredients:
- 3 tablespoons unsalted butter
- 6 ounces semisweet chocolate, best quality
- 3 large eggs, yolks and whites separated
- 1/4 cup of sugar
- 1/2 cup heavy cream, cold
Instructions:
- Place chocolate and butter in a bowl. Melt in the microwave using 30 second intervals, stirring in between, until smooth. Set aside to cool and proceed with the next steps.
- Separate eggs and yolks. Place whites in a large bowl and yolks in a small bowl. Set the yolk aside. Beat the egg whites and beat whites until soft peak form. Slowly add in the sugar and beat the eggs white to a stiff peak.
- Pour the heavy cream into another bowl and beat the heavy cream until stiff peaks form.
- Once the chocolate mixture has cooled, add in the yolks and whisk in completely. Then, gently fold in the whipped cream.
- Finally, take ⅓ of your egg whites and fold it into your chocolate mixture. Repeat with the last ⅔ of your egg white. Everything should be light and fluffy.
- You can use it immediately or set in the fridge until the mousse has fully set.
Assembling the Cake
Ingredients:
- 3-7inch chocolate cake rounds
- 2 cups of chocolate mousse
- 1 cup of heavy cream
- 2 tablespoon of sugar
- 1 tablespoon of cocoa powder
Instructions:
- Using the cake recipe above, you don’t need to trim the cake but if you used another recipe you can trim the cake for a more even finished look.
- Grab the cake pan that you used to make the cake and line it with parchment paper. Make sure its clean and the parchment paper is sticking out. This will help you pull the cake out later.
- Place one cake round, preferably your ugliest, upside down inside the pan and spoon on about 1 cup of mousse. Spread evenly around the cake.
- Place a second cake round, the 2nd prettiest, upside down inside the pan and spoon on another cup of mousse. Spread evenly around the cake.
- Finally, top with the last and prettiest cake round, upside down so the flattest side is facing up.
- Fold the excess parchment paper over the cake and wrap everything with plastic wrap. Set the cake in the fridge for 5 hours or overnight.
- The next day, pop out the cake using the parchment paper overhang and unwrap your masterpiece. Place the cake on top of an upside down plate or a cake stand.
- In a bowl combine heavy cream, cocoa powder, and sugar. Whip until you get chocolate whipped cream. Spread a thin layer of the whipped cream all over the cake so that the cake has a more even and smooth finish.
-
Set in the freezer for 30 minutes. Your cake is now ready for the final touches.
Chocolate Ganache

Ingredients:
- 1.5 cup of heavy cream
- 1 tablespoons of butter
- 12 ounces semisweet chocolate, coarsely chopped
Instructions:
- Pour the heavy cream into a pot and bring to a gentle simmer.
- Dump the chocolate and butter into a bowl and give it a little shake to even out the top. Pour the warmed heavy cream over top being sure that all the chocolate is covered by the hot cream. Cover with plastic wrap and let stand for 5 -7 minutes.
- Once the time is up, give it a gentle but continuous whisk. After 1 minute of whisking the cream and chocolate will come together. Only lift your whisk once you are done whisking. This will ensure a bubble free finish on your cake.
- With your cake assembled and laying on top of a wire rack and sheet pan to catch the drippings, pour over the warm chocolate ganache over the entire cake. Be sure to get the sides.
- Set everything into the fridge for 30 minutes – 1 hour or until the chocolate has set. Cut a slice and enjoy!

Tips:
You can grease the pan to make the parchment paper stick but don’t grease the paper. You want the paper to make contact with the cake batter – don’t worry it will come off. Another important reason for this is when you bake the cake the oil surrounding the cake will become 350 degrees fahrenheit aka the perfect frying temperature. There will be a time in the cakes baking process when the insides need a little more time and the outsides will being to fry. This is not what you want. You want an all around soft and fluffy cake so don’t grease the parchment paper.
You don’t need fancy tools to make a great cake. Granted, I won’t lie to you. They will make your life much easier and they will make your cake look more professional and will take less of your time but they are not needed. You can make do with a heavy plate, some parchment paper, and a small spatula. If you so happen to fall in love with cake making just like I did a child, by all means invest in some cake equipment. If you pick some quality tools they can last you two lifetimes.
You can probably tell that my layers are not perfect especially the top. For me, I don’t care but if you are a perfectionist, you can always weight out your layers or you can pour the batter into a measuring cup and then divide that amount into three equal portions.
TOP ARTICLES
Sourdough Baking School
Master the art of sourdough bread baking in the most comprehensive baking class on the internet. This class features over three hours of baking content to help you start your sourdough journey.
See More

